
How to Build a Custom Record Player Console from Plywood
At Kusstom, we blend craftsmanship and creativity to bring functional beauty to every space.
In this guide, we’ll show you how to build a handmade plywood record player console — the same clean, modern design built by our Kusstom workshop team.
Whether you’re a DIY enthusiast or someone who simply loves the look of handcrafted wood furniture, this project is simple, stylish, and rewarding.
🪵 Materials and Tools You’ll Need
Materials:
- ¾” Birch or Maple plywood (1 full 4x8 ft sheet)
- Wood glue
- 1¼” pocket screws or brad nails
- Sandpaper (120–220 grit)
- Clear coat or Danish oil finish
- Optional: wood filler for edge touch-ups
Tools:
- Table saw or circular saw
- Router (¼” straight bit)
- Sander
- Clamps
- Drill or nailer
- Measuring tape
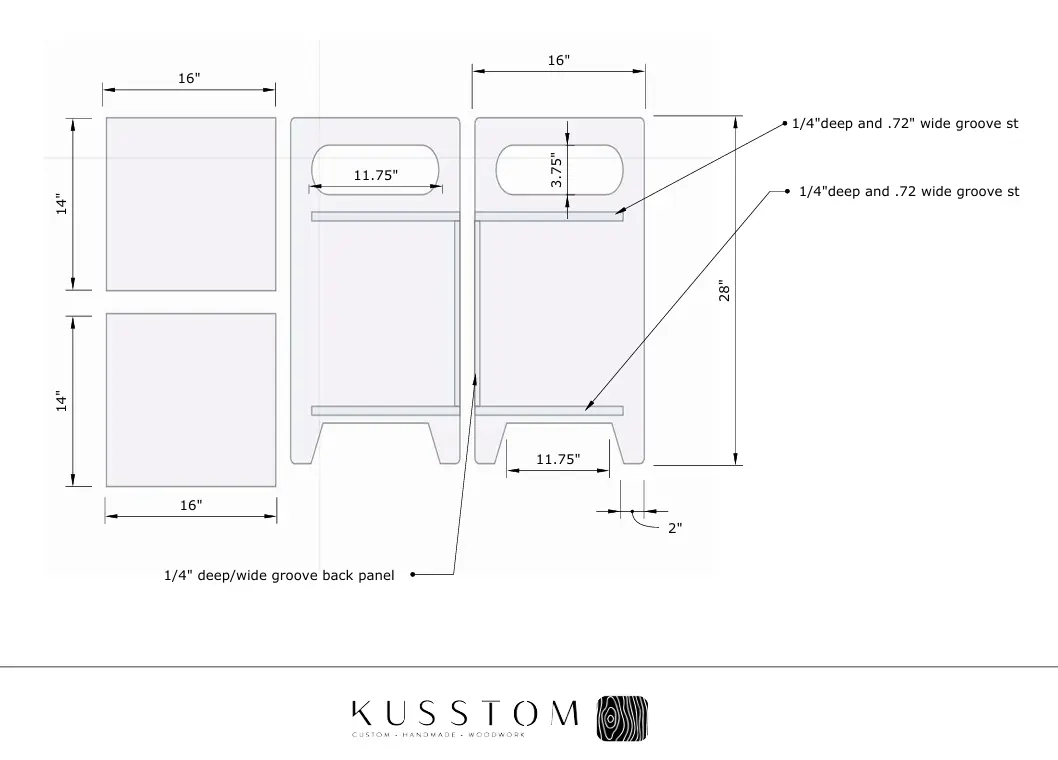
📏 Design Dimensions
Our record player console was designed to balance simplicity and functionality:
| Component | Measurement |
| Height | 28” |
| Width | 16” |
| Depth | 16” |
| Handle Opening | 11.75” × 3.75” |
| Groove | ¼” deep × 0.72” wide |
| Bottom Clearance | 2” |
Each piece connects through routed grooves for a clean, seamless fit — no visible screws or bulky joints.
🧰 Step-by-Step Building Process
1. Cut the Panels
Cut all your panels from the plywood sheet using the diagram:
- (2) side panels — 28” x 16”
- (2) shelves — 16” x 14”
- (1) top panel — 16” x 16”
- (1) back panel — ¼” thick plywood
Make sure edges are smooth and square.
2. Route the Grooves
Use your router to create ¼” deep × 0.72” wide grooves inside the side panels.
These will hold the shelves and back panel snugly in place.
3. Cut Handle Openings
Mark and cut the handle slots (11.75” × 3.75”).
Slightly round the edges for a professional, ergonomic touch.
4. Assemble the Console
Dry-fit the parts before gluing. Once everything aligns:
- Apply wood glue to the grooves
- Insert shelves and back panel
- Clamp and secure with nails or screws
Ensure the structure is square and stable.
5. Sand & Finish
After the glue sets, sand all surfaces with 120–220 grit.
Apply a clear satin polyurethane or Danish oil for a warm, natural look that highlights the wood grain.
The Final Look
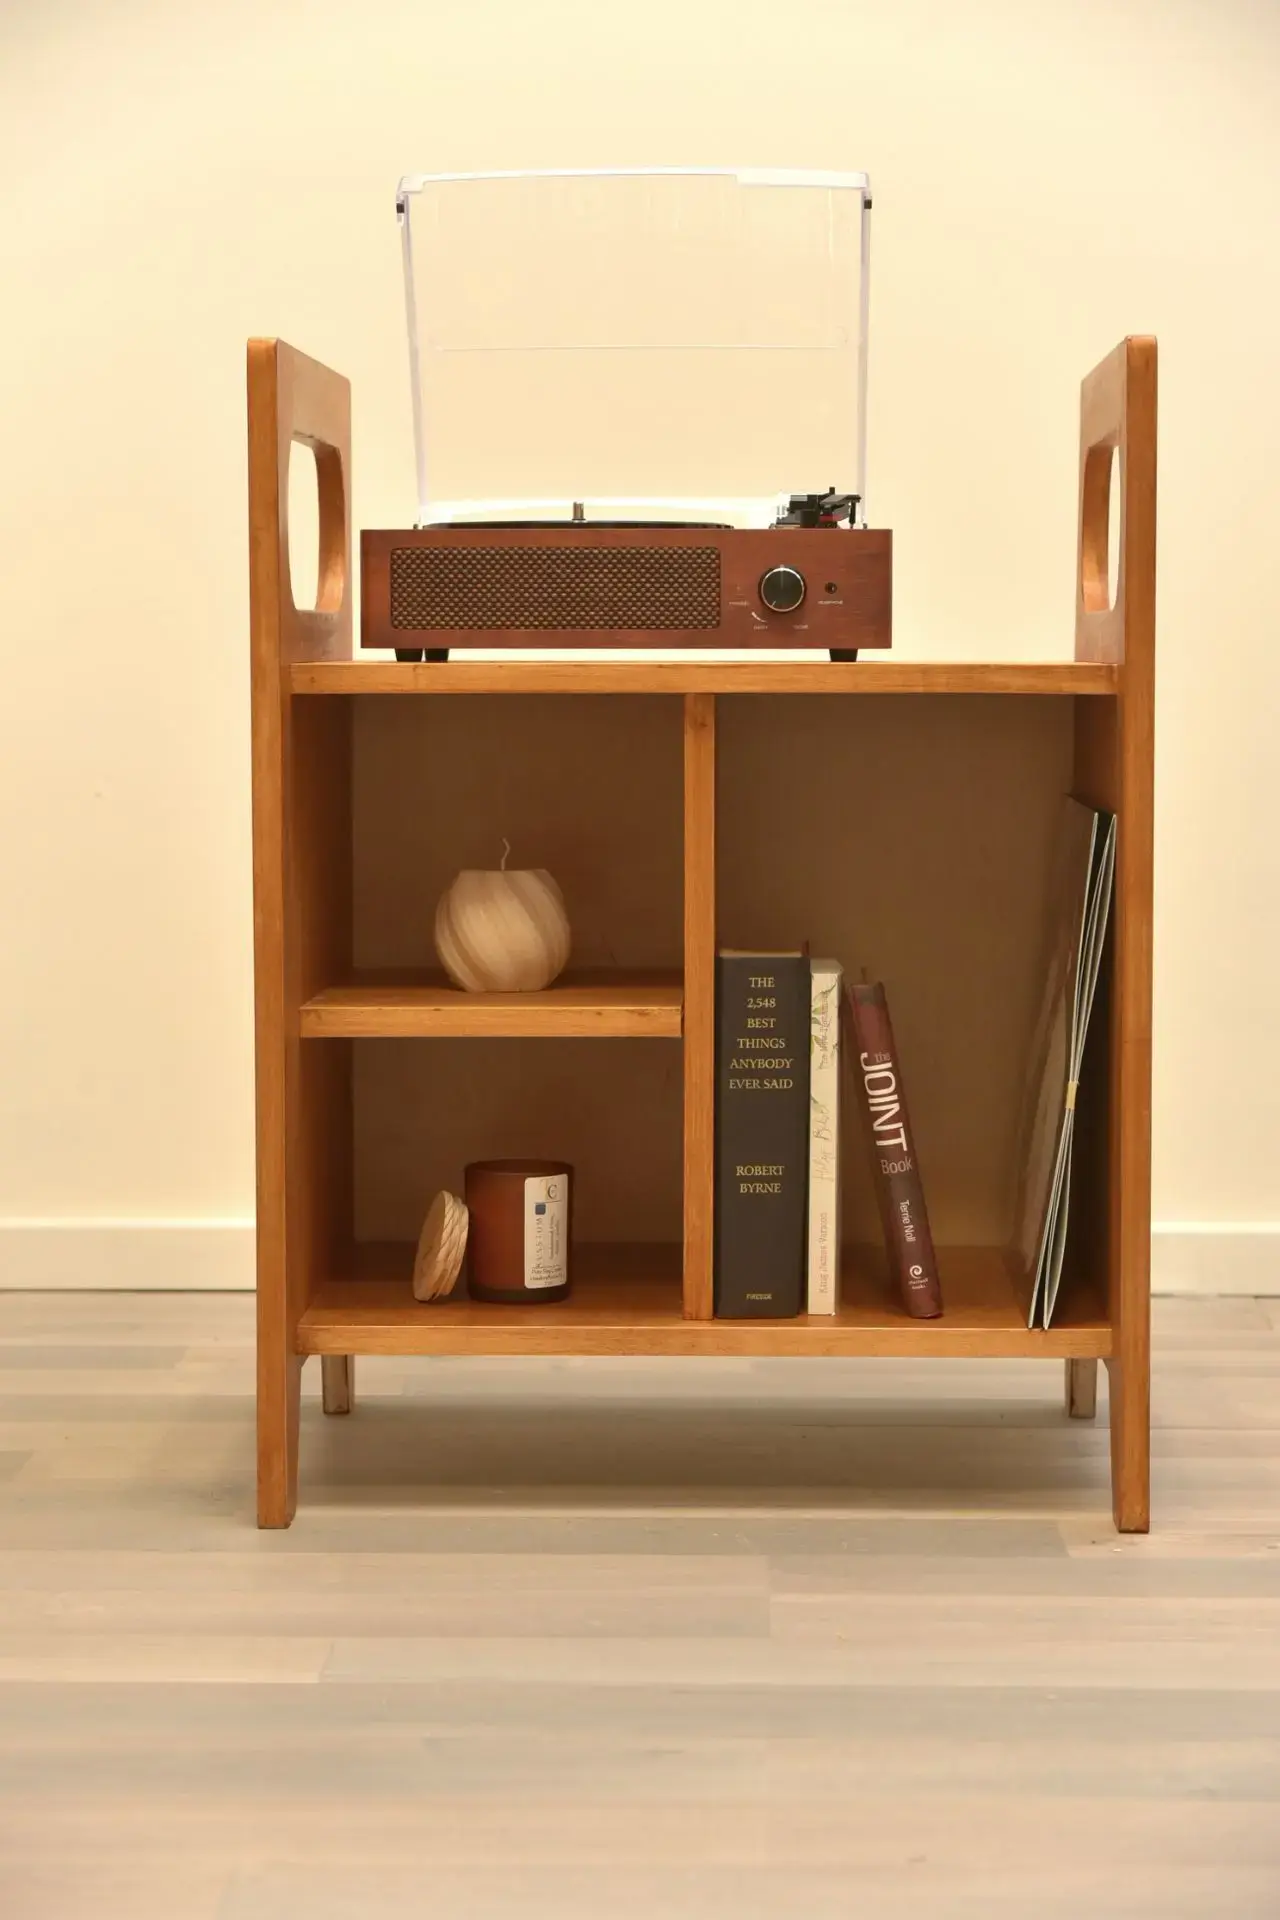
The result is a beautiful, handcrafted record player console — minimal, functional, and timeless.
It’s the perfect piece for your turntable, vinyl collection, and books.
The open handles make it easy to move, and the warm tone adds a modern handmade feel to your space.
Want It Made by Kusstom?
Love the look but don’t have time to build it?
Let Kusstom craft one for you — custom-sized, pre-finished, and ready to use.
Our team can personalize your console with different wood tones, finishes, or vinyl storage options.
🛠️ Shop Handmade Furniture by Kusstom
We design and build custom handmade wood furniture for modern living — from record player stands to built-in shelving, signage, and custom cabinetry.
Every piece is built to order, ensuring craftsmanship and quality in every detail.
🪚 About Kusstom
Kusstom LLC is a Port St. Lucie–based handmade woodwork brand specializing in custom furniture, woodworking, CNC design, and 3D fabrication.
Every piece is made with precision, passion, and purpose.
👉 Learn more at www.kusstom.com
Custom • Handmade • Woodwork